
ServiceNow – Create and Elevate Your First Admin User
Developers who are using a ServiceNow sandbox and have likely just created a ServiceNow Developer Instance will probably create a ServiceNow Administrator. This is a very simple task to carry out once you have gained access to the admin portal. That task is to create a ServiceNow Administrator. A simple user that you will elevate to be an admin. You may choose other roles. Conceptually, it's the same process and it is documented below. Choose any roles you see fit.
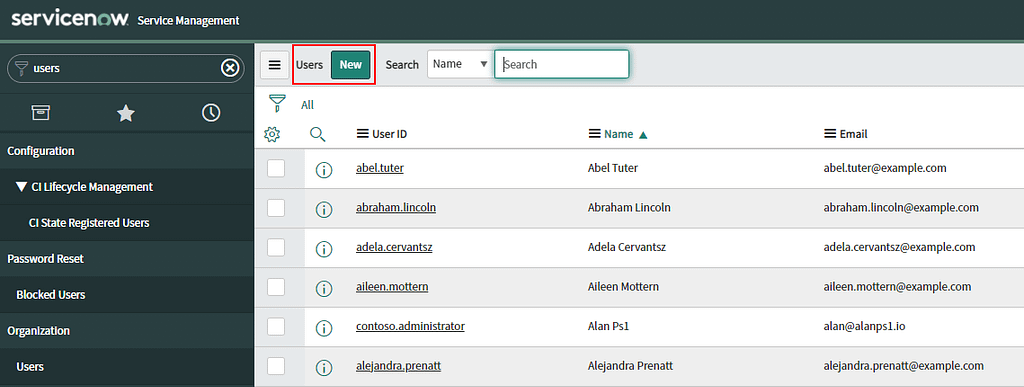
On any page within ServiceNow, use the filter navigator by searching for "users". This will return several results but under the "Organization" category I tend to click users.

You will now be presented with a list of users and have the option to click 'New'.
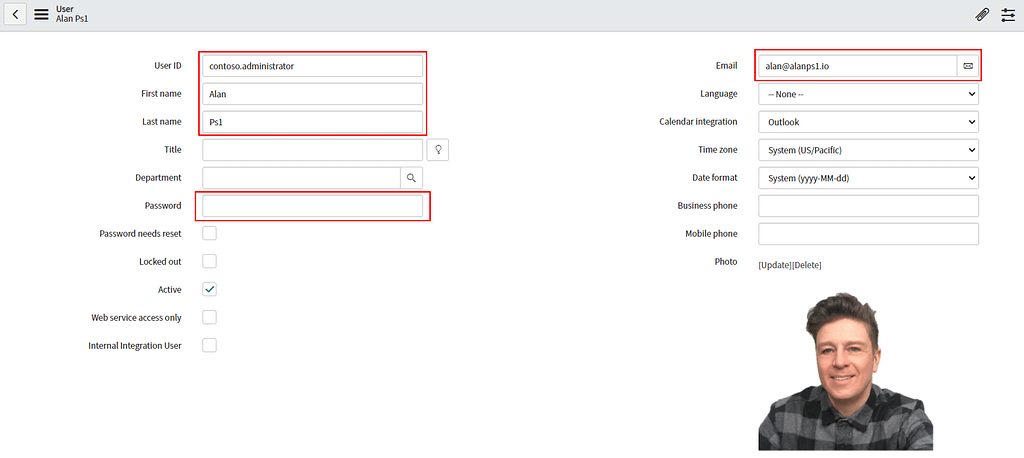
It is likely that you will just need a username & password for this new user. I tend to populate the data something like what you will see below. In this example, the password is blank but be sure to add one.
Elevate ServiceNow Administrator
On the tabs near the bottom page, there is an option to access the roles table and to add a role. Go ahead and do that and in this example, I will grant the user the admin role.


Once you click save, you will see that the admin roles get updated. In my case with the values below.

Now we will be ready to test this out and for the initial test, I will use PowerShell to make a simple REST GET request and to return data on an existing incident that has been logged within my ServiceNow test instance. Below is a sample of some of the sample data that has been generated automatically on the creation of the ServiceNow Developer Instance.
Would you like to buy Alan a coffee?
Visit the AlanPs1 Ko-fi page
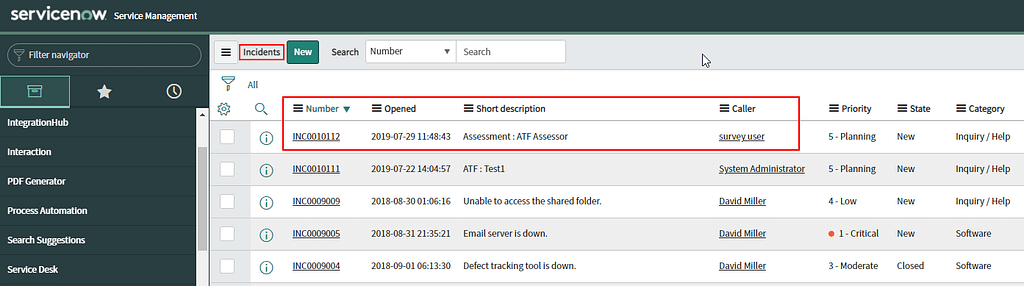
If you use the code below and have configured the user in the way described you should return some data on the ticket you are querying.
# Set the credentials
$User = 'contoso.administrator'
$Pass = 'P4ssw0rd!!'

# Set headers
$GlobalHeaders = New-Object "System.Collections.Generic.Dictionary[[String],[String]]"
$GlobalHeaders.Add('Accept', 'application/json')
$GlobalHeaders.Add('Content-Type', 'application/json')

# Build & set authentication header
$base64AuthInfo = [Convert]::ToBase64String([Text.Encoding]::ASCII.GetBytes(("{0}:{1}" -f $User, $Pass)))
$GlobalHeaders.Add('Authorization', ('Basic {0}' -f $base64AuthInfo))

# Load variable with ServiceNow instance URL
$ServiceNowInstance = 'https://dev99999.service-now.com'

# Build the request body
$Body = @{
    number = 'INC0010112'
}

# Build the paramaters that will be sent off with the REST call
$Params = @{
    Headers = $GlobalHeaders
    Method  = "GET"
    Uri     = "$ServiceNowInstance/api/now/table/incident"
    Body    = $Body
}

# Make the REST GET request
$Response = (Invoke-RestMethod @Params).Result

# Filter the response to show values that match the image ..
$Response | Select-Object number, sys_class_name, short_description
Here is my result …

Thanks for reading, Alan.
Tweet

