
Connect-PnPOnline Unattended Using Azure App-Only Tokens
There are lots of reasons why Connect-PnPOnline unattended authentication is handy using modern authentication methods. This is true in Azure, Exchange Online, Azure AD, SharePoint & more. Azure Automation is the main reason I tend to use them but more regularly, I create scripts, functions & modules that will be used by my colleagues. If I set up authentication using a service principal/Azure App registration, I can then pre-configure the less sensitive data within, leaving my colleagues to pass the certificate password, secret or perhaps thumbprint to the script via the console. This keeps the sensitive data safe but takes away the need for the MFA prompts and permission checks.
Instead of searching for an example of where Connect-PnPOnline unattended can be used, you could reference one of my other blog posts. Get All Site Administrators and Owners With Full Control – SharePoint Online PowerShell uses the method you will see below to carry out a pretty detailed audit of administrators and owner permissions.
In this example, I am going to walk through how I set up an Azure App registration that can be used in this way. There is a very helpful post at PnP-PowerShell covering Connect Using App Permissions that is probably worth a read. This approach is more simple but works very well and it uses a self-signed certificate. I have found it pretty easy to put the certificate in a shared area making it simple for the code to access when colleagues use my PowerShell offerings too.
Here is the code
$Password = "P4ssW0rd"

$SecPassword = ConvertTo-SecureString -String $Password -AsPlainText -Force

$Params = @{
    Out                 = "C:\temp\LabSPOAccess.pfx"
    ValidYears          = 30
    CertificatePassword = $SecPassword
    CommonName          = "LabSPOAccess"
    Country             = "GB"
    State               = "Scotland"
    Locality            = "Glasgow"
}

$Cert = New-PnPAzureCertificate @Params
Observe that a certificate has been created within the same location that your PowerShell prompt was at the time of running the command.
We now need to save off the keycredentials. We will save the output to notepad as we will use it later in the process.
$Cert.KeyCredentials | ClipThe Output should look like the below:
{
    "customKeyIdentifier": "7sQVWwZHT2YYyc7xy6BI2/pRlPE=",
    "keyId": "48a3abe4-7280-458f-a73c-e4b7bd06a35f",
    "type": "AsymmetricX509Cert",
    "usage": "Verify",
    "value":  "MIIDGjCCAgKgAwIBAgIQHE+GMpj9HJdP/I6cnY8ufTANBgkqhkiG9w0BAQUFADBIMRUwEwYDVQQDEwxMYWJTU ... E9BY2Nlc3MxCzAJBgNVBAYTAkdCMREwDwYDVQQ/5"
}
Now time to head on over to App Registrations within portal.azure.com.
Would you like to buy Alan a coffee?
Visit the AlanPs1 Ko-fi page
- Choose + New registration
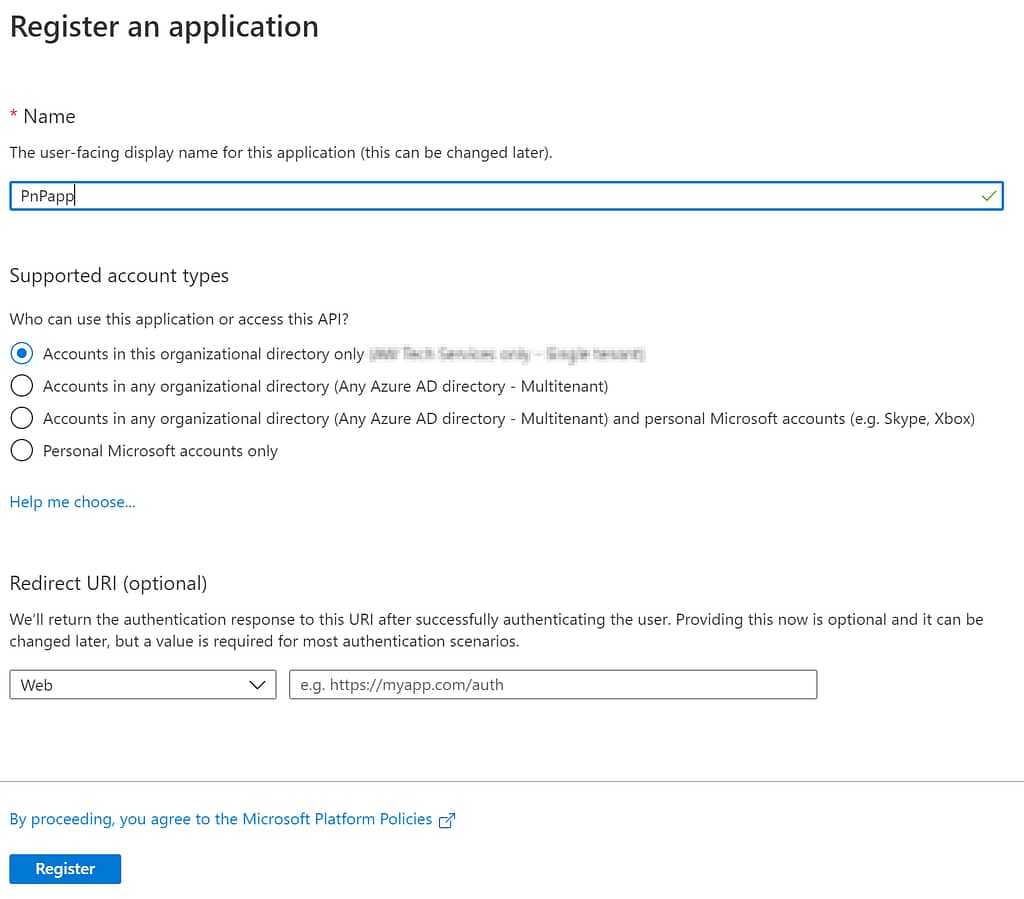
- In the 'Register an application' form provide a name (PnPapp)
- Select Accounts in this organizational directory only
- Choose Register
Here is a visual representation of those steps:
Now, let's give the app some permissions.
NB: You could choose any permissions for any API that suits your needs. For this example I will be setting access to SharePoint Online.
- On the Overview page, select API permissions
- Choose + Add a permission
- In the Microsoft APIs tab, choose SharePoint
- In the Request API permission form, select Delegated permissions, check AllSites.FullControl, TermStore.ReadWrite.All, User.ReadWrite.All
- Select Add permissions
- Choose Application permissions, check Sites.FullControl, TermStore.ReadWrite.All, User.ReadWrite.All
- Select Add permissions
- Below Grant consent, select Grant admin consent for "tenant-name" and when prompted choose Yes
- Select Overview in the navigation panel, record the Display Name, Application ID, and Directory ID values from the app registration to a notepad file.
- In the navigation panel, select Certificates & Secrets
- Now switch to the Manifest blade
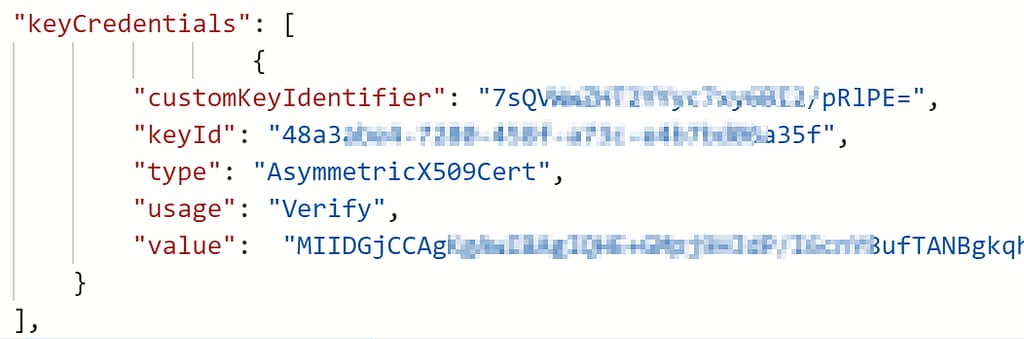
- Look for "keyCredentials": []
- Paste the JSON output from KeyCredentials within []
The KeyCredentials should look like the below, after a little tidy up but white space won't matter.
You are now ready to use Connect-PnPOnline unattended to authenticate.
The Connect-PnPOnline Unattended Code
$ClientID = "5d7e91f2-5f47-45bc-9c66-4gtyu958498f"
$CertPath = "$Home\AppData\Local\LabSPOAccess.pfx"
$CertPass = "P4ssW0rd"
$Password = (ConvertTo-SecureString -AsPlainText $CertPass -Force)
$SiteUrl  = "https://contoso-my.sharepoint.com/personal/j_doe_contoso_com"
$AadDoman = "contoso.onmicrosoft.com"

$Params = @{
    ClientId            = $ClientID
    CertificatePath     = $CertPath
    CertificatePassword = $Password
    Url                 = $SiteUrl
    Tenant              = $AadDomain
}

Connect-PnPOnline @Params
So there you have it. No need for MFA with permissions set to access the whole of the SharePoint Online tenant and OneDrive sites too. Give it a try and swap out authenticating with your own admin identity and enjoy the freedom it provides.
Thanks for reading
Tweet

