
Power Query – Use Power BI or Excel to connect to Office 365 Service API
Using Power Query within Power BI and within Excel has many uses. In this conceptual example, I will make data from the Office 365 Service Communications API available within excel so we are able to check the service status of each cloud service. At a glance we can then determine if there is any Service Degradation affecting an Office 365 Service.
Here is a method (MFA bypass required) you can use to get at the data in which you can then model:
Azure App to Allow API Communication
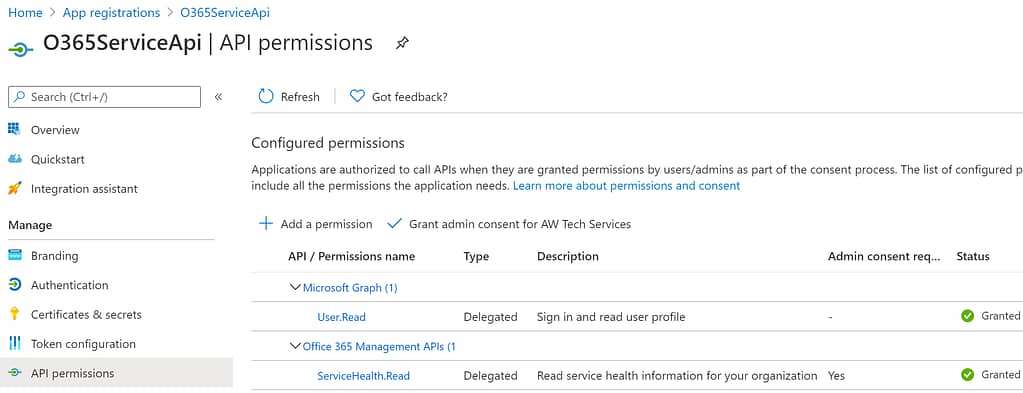
Firstly, you will need an Azure App registration set up with permissions to access the API. At a minimum, the delegated permission for ServiceHealth.Read is required.
Once you have the App set up, you will need to create/retrieve then capture the following values:
- Tenant ID
- Client ID
- Username
- Password
- RedirectURI
NB: This blog will not explain the creation of Azure App Registration but see this link if you would like more information on Create Azure App Registration for Accessing Office 365 Service Communications API.
Let's jump to Microsoft Excel desktop version and open a new blank workbook.
Using Excel and M Power Query to Pull Data from API
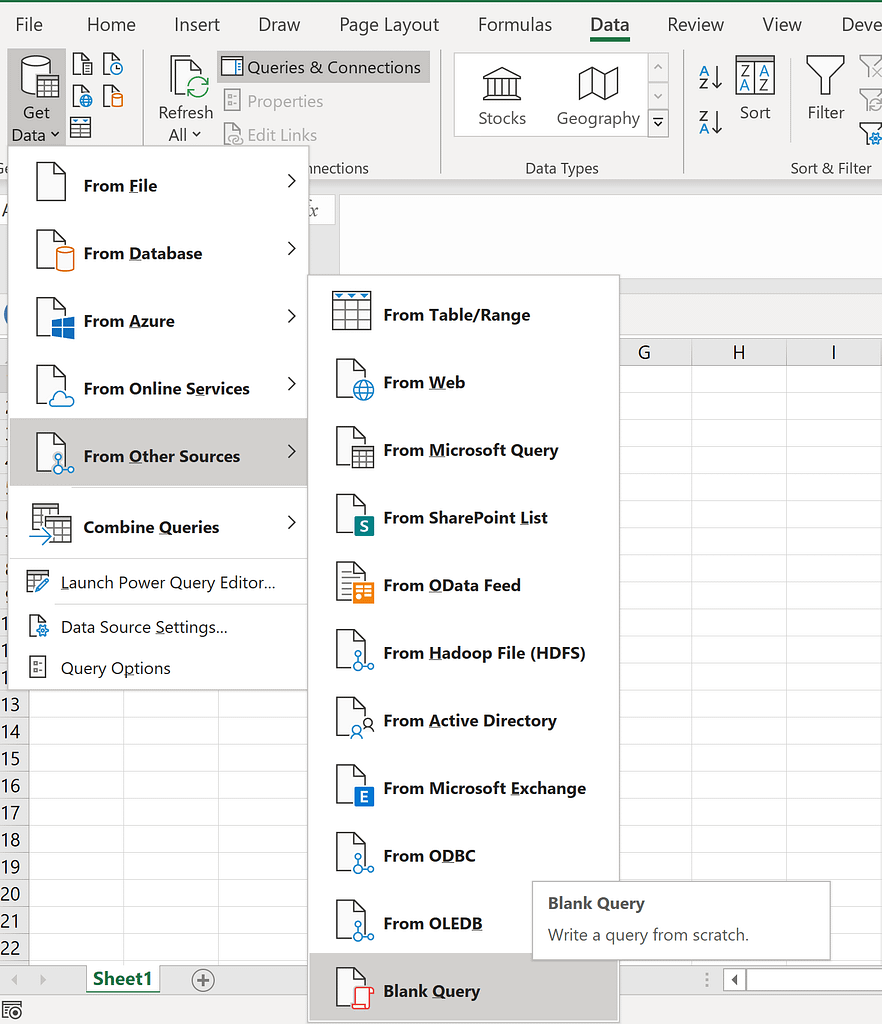
- On the Ribbon, choose Data and then From Other Sources then Blank Query.
- The Power Query Editor will now open and firstly, we will start with going to the Parameters section of the Ribbon and choosing Manage Parameters.
- Populated 5 parameters as shown in the image below
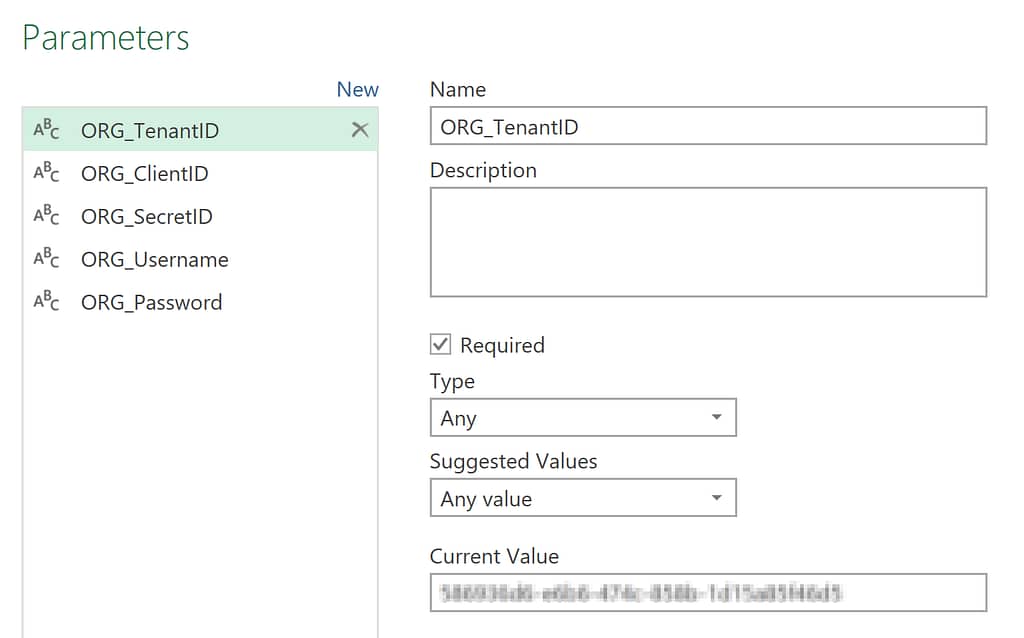
NB: In this method, the Username & Password will be of an account that has permission to view the service activity.
Would you like to buy Alan a coffee?
Visit the AlanPs1 Ko-fi page
- Go to Advanced Editor and paste in the code below
let

// Set values relevant to your pre-configured parameters

client_id     = ORG_ClientID,
client_secret = ORG_ClientSecret,
username      = ORG_Username,
password      = ORG_Password,

// Set global values required in the REST call

redirect_uri  = "https://www.contoso.com/oauth2/callback",
token_uri     = "https://login.windows.net/common/oauth2/token",
authorize_uri = "https://login.windows.net/common/oauth2/authorize",
resource      = "https://manage.office.com",

// Generate the Oauth token

tokenResponse = Json.Document(Web.Contents(token_uri,

    [

    Content = Text.ToBinary(Uri.BuildQueryString([

            client_id     = client_id,
            client_secret = client_secret,
            username      = username,
            password      = password,
            resource      = resource,
            grant_type    = "password",
            redirect_uri  = redirect_uri

    ])),

    Headers = [Accept    = "application/json"],
    ManualStatusHandling = { 400 }

    ])),

access_token = tokenResponse[access_token],
token = tokenResponse[access_token],

// Now that we have the token, make REST call

endpoint = "https://manage.office.com/api/v1.0/"&ORG_TenantID&"/ServiceComms/CurrentStatus ",
response = Json.Document(Web.Contents(endpoint,

        [

        Headers = [ Authorization="Bearer "&#"token" ]

        ]

    )),

value = response[value],

#"Converted to Table" = Table.FromList(value, Splitter.SplitByNothing(), null, null, ExtraValues.Error)

in
#"Converted to Table"
On Saving the data you should see that you are now able to edit the data within Power Query Editor.
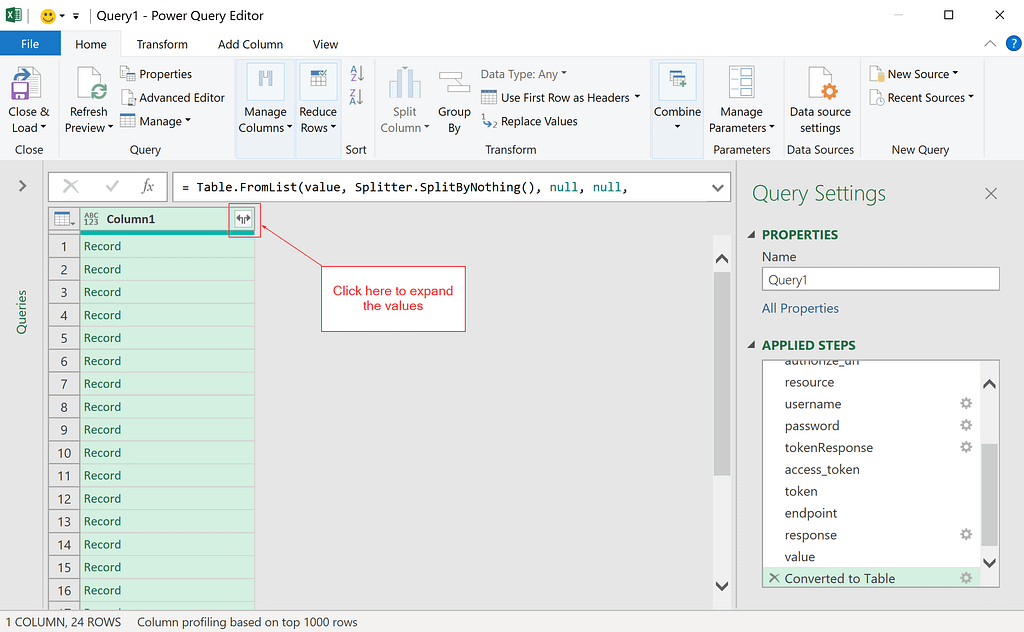
You are now able to model the data within Excel.
Should you now want to create more complex queries or hide colums etc you are able to step on for here.
Once you click Close and Load, this is the end result:

This process can be easily manipulated to target other Office 365 Management APIs. Feel free to adapt this model to suit your requirements.
Thanks for reading.
Tweet

